Operator's guide to the Powermax SYNC display
This short video provides a brief overview of the Powermax SYNC® front panel display, focusing on the screens that operators are most likely to use. We will review how to adjust and reset settings, navigate to Hypertherm cartridge data, and other useful information.
Main menu overview
Access the main menu screen by pushing and holding the Amperage/Gas Selector button for 2 seconds. Four options will appear on the screen.
Cartridge and power supply – This icon provides access to information about the Hypertherm cartridge and the plasma power supply.
-
Cartridge data – This screen shows data about the Hypertherm cartridge that is installed on the torch. Each Hypertherm cartridge contains data about how it has been used.
-
Plasma power supply data – This screen shows data about plasma power supply use and performance.
-
Cartridge history – This screen shows cumulative cartridge start data for the life of the plasma power supply.
-
-
System information – This icon provides access to service-related information about printed circuit boards (PCBs) in the plasma power supply and in the SmartSYNC® torch.
-
LCD/control PCB information – This screen shows service-related information about the firmware on the plasma power supply’s LCD/control PCB.
-
DSP and power PCB information – This screen shows service-related information about the plasma power supply’s power PCB and the firmware on the DSP PCB.
-
Torch information – This screen shows service-related information about the SmartSYNC torch that is connected to the plasma power supply. The technical information on this screen is used by qualified service technicians when troubleshooting.
-
-
Service information – This icon provides access to service-related information about fault codes, radio frequency (RF) settings and logs, and cut counter transfers.
-
Power supply fault log – This screen shows the 10 most recent fault codes that have occurred on the plasma power supply. This screen does NOT show operational fault codes (0-nn-n).
-
Radio frequency information – This screen shows service-related information about RF settings and logs. This information is for qualified service technicians.
-
Cut counters transfer – Select this icon to transfer cut counter data before installing a new DSP PCB. This feature is for qualified service technicians.
-
-
Settings – This icon provides access to system settings that you can change, such as the brightness and contrast of the LCD screen.
-
Brightness and contrast – Use this screen to adjust the brightness and contrast of the LCD screen or to show cartridge data on the status screen.
-
CNC interface settings – This screen shows the node address given to the Powermax plasma power supply (if applicable). This screen is for qualified service technicians.
-
System configuration settings – Use this screen to set system features to on or off, such as the low gas pressure detection feature, cartridge end-of-life detection feature, and Hypertherm cartridge and SmartSYNC data detection features. Only experienced operators should change these fields from their default settings.
-
Operators will find valuable information and capabilities in the cartridge data and settings screens. While viewing these screens, an Exit/Return arrow is available in the upper left-hand corner of the screen to return to the previous screen.
Pressing the Gas Pressure Setting Mode Selector button will exit directly to the main status display screen.
Cartridge and power supply menu
To select the cartridge and power supply screen, use the adjustment knob to highlight the first icon (#1) and press the Amperage/Gas Selector button to accept. You can see the cartridge data, power supply data, and the complete cartridge history for the system on this screen.
Cartridge data screen
-
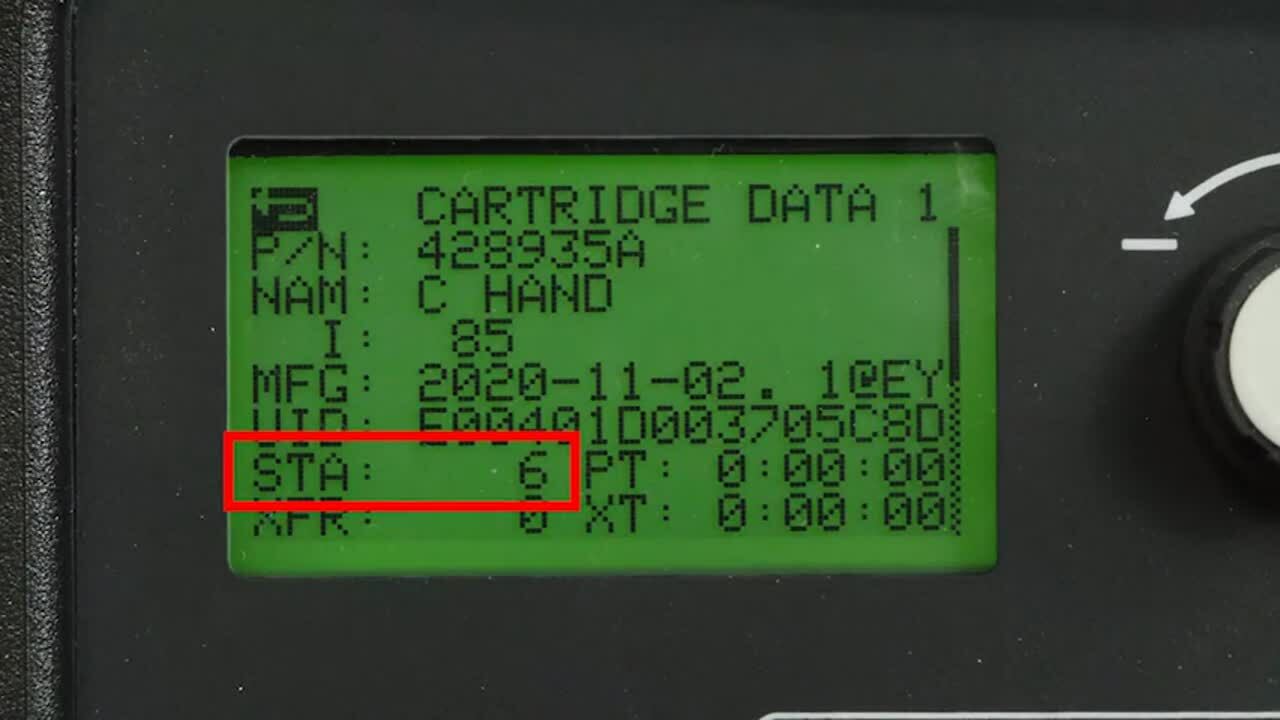
The cartridge data screen displays the part number, description, and maximum amperage for the current cartridge. This screen also shows cartridge usage data such as starts, pilot arc time, transfers, and transfer time.
-
You can use this information to analyze system performance. When the torch is fired, the starts field changes but the transfers field does not change. This happens because there was no arc transfer to a workpiece. Excessive piloting without transfer can negatively impact cartridge life.
-
When a previously used cartridge is installed, the data will change to reflect the usage history of that cartridge.
-
Once a cartridge has been completely used, you can record the life data of the cartridge to compare it to other cartridges.
-
Use the Exit/Return arrow to return to the previous screen to select power supply information.
Power supply data screen
The power supply data screen displays current status information, including current, incoming voltage, active fault code, arc voltage, gas inlet pressure, component temperatures, cumulative pilot arc time, and transfer time.
Cartridge history screen
The last menu option in this category is Cartridge History, which is represented by a pie chart. The cartridge history screen provides the user with statistics on the cumulative data for all cartridges used on the system. Here you can find the number of starts for cutting, gouging, or expanded metal mode. A complete list of the icons found on this screen is available in the operator manual.
Settings options
When you choose the settings icon, you can set the operator preferences for the LCD display screen.
-
Select the LCD category and adjust the brightness and contrast for better viewing.
-
There is a selection to display starts and transfers at the main status screen while in operation. To enable this feature, use the adjustment knob to check the box and press the Amperage/Gas Selector button.
To return to the default system settings, press the Amperage/Gas Selector button and the Pressure Setting Mode Selector button together for 2 seconds. Once you are at the factory reset screen, use the adjustment knob to select the Yes button. Press the Gas Selector button to reset the unit to factory settings.
For detailed descriptions of all menu options, refer to your owner manual.
The Powermax SYNC front panel provides easy access to some important information about your Powermax system, including usage statistics, recent faults, and cartridge data. Take a moment to familiarize yourself with the information you can access and understand how best to use this panel to optimize performance of your Powermax SYNC plasma system.