Powermax pressure faults for systems under 50 amps
Three easy steps to fix low air pressure problems
When you use a Powermax® system, you may experience cutting interruptions. To return to normal cutting operation as quickly as possible, you need to be able to identify the symptoms of different cutting failures, know how to locate fault icons on the machine, and test common causes of the fault indicated.
This short video will help you identify the symptoms of a low pressure error on Powermax30, 30 XP, 45, and 45 XP machines. It also explains where to locate the fault icons on your machine and some possible solutions to this error code.
Identifying a low pressure fault
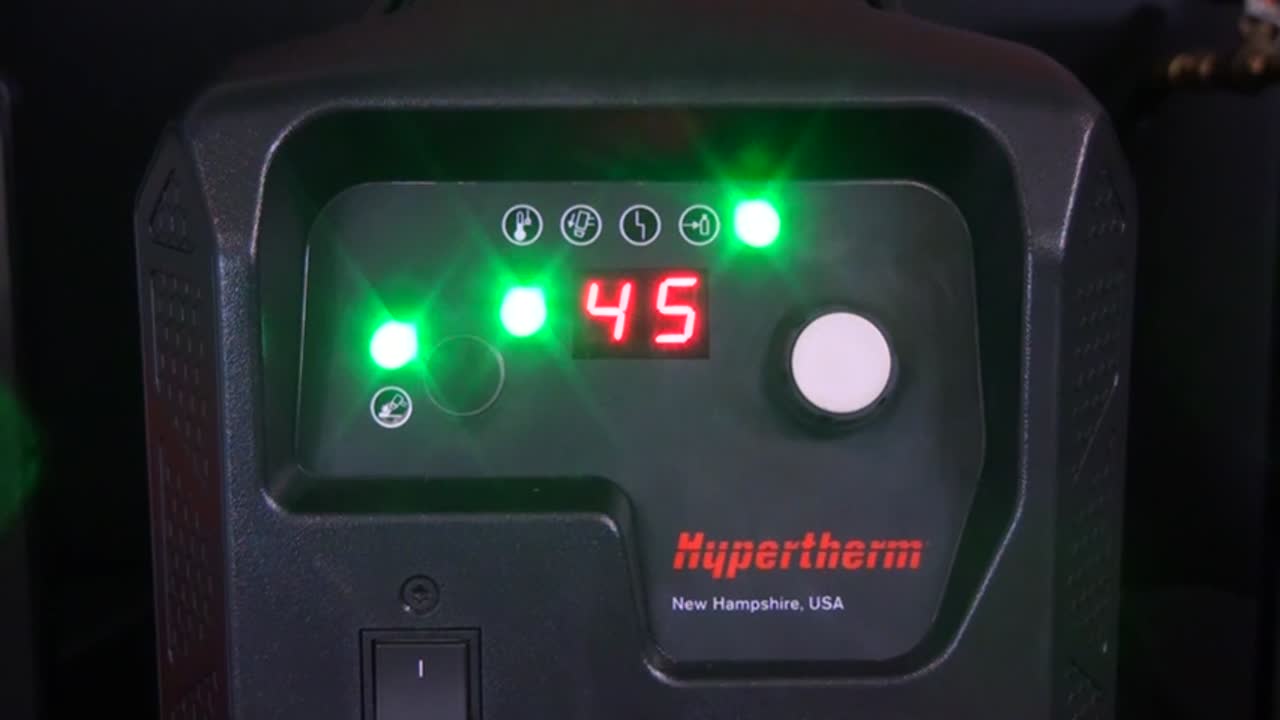
Always check the front panel of your Powermax system for loss of power and fault icons. For the Powermax30, 30 XP, 45, and 45 XP, a low pressure fault can be identified when the torch fails to fire and the gas pressure light on the machine’s front panel is illuminated.
When this situation occurs, begin by checking the inlet gas line and torch lead for leaks or restrictions. If there are no leaks or restrictions, check the pressure gauge at the gas source to verify the output setting. Reference your Hypertherm operator manual for the correct pressure settings. If the incoming gas pressure is too low, increase the pressure to the acceptable range. When the gas pressure is within the correct operating range, the gas pressure light will turn off and the torch will continue operation.
There are two ways to read the gas pressure: static, when the gas is not flowing through the machine, and dynamic, when the gas is flowing through the machine. The Powermax30 and 30 XP only allow static pressure readings.
Gas test mode
Gas test mode can be used to check for sufficient gas flow from the machine when operating a Powermax45 and 45 XP. It’s important to make sure that the gas pressure stays above the minimum threshold when the gas is flowing during gas test mode.
Powermax45 gas test mode
To enter gas test mode on the Powermax45, set the amperage adjustment knob to the gas test position, fully counterclockwise. On the top of the system, pull up on the pressure regulator knob to unlock it. Turning this knob will regulate gas flow through the system.
The pressure bar is on the right side of the front of the machine. Turn the regulator knob until the pressure LED shows a green bar in the center of the pressure bar and then press down on the knob to lock it into position. Turn the amperage knob to the cutting current for your current application to exit gas test mode.
Powermax45 XP gas test mode
To enter gas test mode on the Powermax45 XP, press and hold the mode button for approximately five seconds. Release the mode button when the two-digit display shows the letters “PC.” This indicates a pressure check. The pressure the machine is set on will blink on the two-digit display before the actual output gas pressure is displayed. Make note of the set pressure so you can compare it to the actual pressure. While in gas test mode, check for air flowing continuously from the torch tip and make sure the amps LED remains off.
Exit gas test mode by pressing the mode button. If the actual pressure needs to be raised or lowered for the cutting application, press and hold the mode button with one hand. Turn the adjustment knob to the desired pressure with the other hand. After you release the mode button, the two-digit display changes from gas pressure back to amperage.
What to do if the low pressure fault continues
If the low pressure fault continues, the air filter element needs to be inspected. To inspect the air filter on all Powermax systems, the machine needs to be turned off and disconnected from the power source and the gas supply must be disconnected at the machine.
Checking the filter on the Powermax30 and Powermax30 XP
For the Powermax30 and 30 XP, remove the cover from the power supply by unscrewing the two Phillips head screws on each side of the handle. The handle will separate and the cover will slide upwards. On the right side of the machine, locate and remove the drain hose from the hole in the bottom of the power supply’s base. Unscrew the nut that holds the air filter in the bracket. As you unscrew the nut, tip the bottom of the air filter away from the power supply. This makes removing the filter easier for you. With the body tipped, unscrew the filter bowl from the body.
Unscrew the element from the filter body and inspect for oil and other debris that may cause restrictions in gas flow. If the element is dirty, replace it with a new Hypertherm air filter and screw it back into the body. Reattach the filter bowl and screw the retainer nut back on. Connect the drain hose, and reassemble the cover with the handle.
After the power supply has been reassembled, reconnect the electrical power and gas supply. If the low pressure fault light persists, contact your Hypertherm distributor or authorized repair facility for assistance.
Checking the filter on the Powermax45
For the Powermax45, remove the cover from the power supply by unscrewing the two Phillips head screws on each side of the handle. The handle will separate and the cover will slide upwards. On the right side of the machine, locate and remove the drain hose from the hole in the bottom of the power supply’s base. Unscrew the nut that holds the air filter in the bracket. As you unscrew the nut, tip the bottom of the air filter away from the power supply and unscrew the filter bowl from the body.
The glass filter tube needs to be removed by twisting and pulling gently until it releases. Unscrew the element from the filter body and inspect for oil and other debris that may cause restrictions in gas flow. If the element is dirty, replace it with a new Hypertherm air filter and screw it back into the body. Place the glass filter tube inside the filter bowl. Reattach the filter bowl and reposition the air filter assembly in the bracket. Once in place, screw the retainer nut back on. Connect the drain hose and reassemble the cover with the handle.
After the power supply has been reassembled, reconnect the electrical power and gas supply. If the low pressure fault light persists, contact your Hypertherm distributor or authorized repair facility for assistance.
Checking the filter on the Powermax45XP
On the Powermax45 XP, the filter is located on the back of the machine. To remove and inspect it, locate the air filter assembly below the gas quick disconnect fitting. Remove the air filter bowl by unscrewing the metal guard. It will separate from the air filter assembly inside the power supply.
Next, remove the air filter bowl from the metal guard. The filter element is inside the bowl. Gently pry the element out of the bowl being careful not to damage the O-ring at the top of the bowl. With the element in hand, twist the plastic fittings approximately a quarter turn until they come apart. Set the fittings aside and inspect the element for oil or debris.
If the air filter is dirty or damaged, replace it with a new air filter element. Enclose the new element in the plastic fittings, and twist them until they lock together, approximately a quarter turn. Clean and inspect the air filter bowl before reinstallation. Wipe away any oil, dirt, or other contaminants from inside the bowl. Yellow residue in the filter bowl often indicates that oil is getting into the gas supply line.
You also need to inspect the O-ring at the top of the filter bowl. Replace the O-ring if it is cracked or damaged. Position the filter element inside the filter bowl and press down on top of the plastic fitting. The air filter element should snap into place.
Place the air filter bowl back inside the metal guard and screw it into the air filter assembly. Hand tighten the air filter bowl making sure to not overtighten it. Reconnect the gas supply and the power cord to the machine and power the machine on. If the low pressure fault light persists, contact your Hypertherm distributor or authorized repair facility for assistance.
Understanding the causes of cutting disruptions and some of the most common reasons for these disruptions helps you return to normal cutting operation faster. Refer to your operator manual for a complete list of faults and how to troubleshoot them.