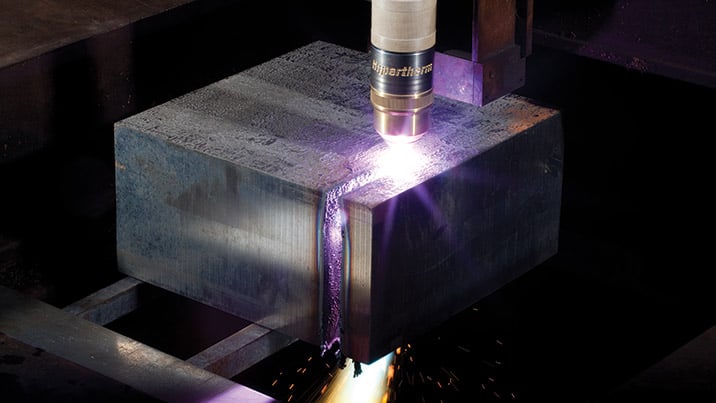
The most effective thick metal cutting techniques
For HPR400XD and HPR800XD plasma cutting systems

For HPR400XD and HPR800XD plasma cutting systems
Using plasma to successfully cut thick metal requires more skill and technique than using plasma on thinner metal. The thick metal cutting techniques outlined below, and described in detail in this white paper, may be needed from beginning a cut with an edge start to finishing a cut with a completely severed part.
Note: Unless otherwise specified, thick metal consists of stainless steel and aluminum from 125 mm to 160 mm (5" to 6.25") thick. The techniques outlined below, and detailed in this white paper, were developed using 304L stainless steel.
The white paper describes thick metal cutting techniques developed for the HPR800XD® that can help manage the large plasma lag angles associated with thick metal cutting. It also describes the timing and sequencing needed for piercing up to 100 mm (4") stainless steel and 75 mm (3") aluminum. The document is broken into four sections:
-
Thick metal cutting techniquesare an overview of different lag angle management techniques and cover a plasma cut from beginning to completion.
-
Dogleg lead-out details for thick stainless steelcover a special lead-out technique to completely sever a stainless steel part up to 160 mm (6.25") thick.
-
Stationary piercing (up to 3-inch stainless steel and aluminum)describes the timing and sequence to be followed to perform stationary piercing on 75 mm (3") stainless steel and aluminum.
-
Moving pierce technique (up to 4-inch stainless steel)describes a moving pierce technique for thick stainless steel that can be used to extend the pierce capacity of the HPR800XD to 100 mm (4") and the HPR400XD® to 75 mm (3").
Thick metal cutting techniques overview
Using an edge start on thick metal requires proper positioning of the torch to allow the molten metal to carry down the majority of the thickness. Set the height of the torch to the cut height listed in the cut chart in the HPR800XD Instruction Manual.
-
Place the torch center line about 6 mm (0.25") from the edge of the workpiece.
-
An adequate motion delay must be used to allow enough time for the arc to melt the majority of the edge prior to motion being initiated. Refer to the HPR800XD Instruction Manual for suggested motion delays.
-
Use an initial cut speed of 75% of full cut speed for at least the first 25 mm (1") of the cut.
Special cornering considerations may be necessary when working with thick metal because of the extreme lag of the tail of the arc. If no technique is used, the cut edge may lose its form, especially near the bottom of the cut.
-
Rounding corners: Round off corners of 90 degrees or less. In general, the radius should be equal to or greater than the kerf value (larger is better).
-
Corner delay: Allow the motion to stop in the corner for approximately one second to allow the arc tail to catch up.
-
Corner slow-down: Approximately 25 mm (1") before entering the corner, slow the cut speed to 75% of full cut speed and maintain that speed for approximately 25 mm (1") after the corner.
Metal five or more inches thick requires special exiting techniques to avoid incompletely severing the part.
-
For cuts that involve the arc exiting the edge of the material, a cut speed of 75% of full cut speed should be used for the last 25 mm (1") of the cut. The cutting table must continue motion beyond the edge of the plate.
-
The dogleg lead-out technique (described below) can be used to redirect the tail of the arc and the molten metal flow into the remaining portion of the cut, allowing for a complete cut.
Dogleg lead-out
Proper lead-out for thick material is critical to completely sever a part. Without proper lead-out, a small tab may keep the part attached to the skeleton at the point where the lead-out enters the lead-in due to the extreme lagging tail of the arc. The dogleg method for stainless steel takes advantage of this lagging arc by focusing it onto the tab section of the cut.
-
Follow the edge start, lead-in, and cornering recommendations outlined above.
-
Cut the external contour of the part and approach lead-out.
-
Just as the arc breaks through to kerf, change the cut direction by approximately 120 degrees into the skeleton at 115% of the cut speed.
-
Continue the lead-out segment for approximately 32 mm (1.25"). The molten metal flow from cutting into the skeleton will melt the tab, completing the cut and allowing the part to drop.
Stationary piercing (up to 3-inch stainless steel and aluminum)
PowerPierce® technology in the HPR800XD makes piercing up to 75 mm (3") easily achievable with stainless steel and aluminum.
-
Position the torch over the pierce location and command the torch lifter to perform the initial height routine.
-
Position the torch to the transfer height as listed in the cut chart in the HPR800XD Instruction Manual.
-
Initiate the arc firing sequence. The arc will extend from the torch and transfer to the surface of the plate.
-
Immediately after arc transfer, move the torch to the pierce height as listed in the cut chart.
-
Allow the arc to penetrate the material. The arc should be fully through the plate prior to initiating motion.
-
Maintain the torch at the pierce height and begin motion into the part lead-in. Drop the torch to the cut height before the end of the lead-in section.
-
Cut the part.
Moving pierce technique (up to 4-inch stainless steel)
The moving pierce technique combined with PowerPierce technology extends the stainless steel pierce capacity for the HPR800XD to 100 mm (4") and for the HPR400XD to 75 mm (3"). The moving pierce method uses synchronization of torch lifter positioning, table motion, and plasma current ramping to achieve a relatively short pierce lead-in that directs the molten material to the side and away from the torch.
-
An initial height sense is performed, and the torch is positioned at the transfer height.
-
The torch is started and transfers to the workpiece; the current ramp-up begins.
-
After transfer, the torch quickly moves to the pierce height, and the table motion begins.
-
The torch is maintained at the pierce height until the moving delay has expired.
-
Once the moving delay has expired, the torch will move to the pierce end height.
-
The torch will remain at the pierce end height for the duration of the cut height delay. When the cut height delay expires, the torch will move to the cut height until the moving pierce automatic voltage control delay ends.
-
The arc voltage control will begin when the moving pierce automatic voltage control delay ends.
-
The contour cut of the part is completed.
For a detailed explanation of the thick metal cutting techniques outlined above, download the whitepaper, “Thick metal cutting techniques for HPR400XD and HPR800XD plasma cutting systems.”


